Wednesday, November 28, 2007

Consider the Donkey

Seattle-based professional outdoor recreation and lifestyle photographer Chase Jarvis put together this half-hour video discussing how he shuffles his gear from here to location:


It's contains a lot of great information, especially for those who travel and photograph overseas.

If you don't have time for the 30-minute Advanced version of the video, Chase also posted a truncated, ten-minute version to YouTube.

-30-

Labels: , , , ,


More: Full Post and Comments

Saturday, October 13, 2007

Ashley & Tyler, 10.06.07

Ashley and Tyler had a fantastic wedding, and shooting them was an absolute blast. It was great seeing a bride wearing her hair down. It was great to see a bouquet that wasn't full of roses or callas. The variety was awesome!

The ceremony was outside at the Eau Claire Dells. It had been raining the night before, and the near-record high temperatures during the day made the air humid. The colors were completely gorgeous, although they were maybe a few days or a week past peak. The Maple Hills Golf Course near Wittenberg, WI hosted the reception, more location shots, and a really awesome leaf throw, where the entire bridal party lined up with huge bunches of leaves, and on the count of three, tossed them way up into the air. (I told you they were cool.)


Find more at paulomernik.com

Labels: , , ,


More: Full Post and Comments

Monday, October 1, 2007

Carrie & Jeremy, 09.22.07

I had the pleasure of second-shooting Carrie and Jeremy on 9/22. Their ceremony took place at St. Stanislaus, with the location shots at Jordan Park, and the reception at Country Springs Hotel, all in Stevens Point.


Check out more at paulomernik.com

Labels: , , ,


More: Full Post and Comments

Tuesday, August 14, 2007

Perseids

Perseid

From 11PM on August 12th until 3AM on August 13th I was found outside at the Lake Hudson Recreation Area in Michigan. After exposing over 140 frames, I found that one of my images (the second I shot) had this gorgeous specimen, and another taken a couple frames later had several small trails that are almost unidentifiable.

However, it appears my expedition to see the Perseids was not ignored, as my Perseid image was used in an ABC News webcast. The image also reached into the top four images of the day on Flickr.

Back to Hudson Lake: I was sorely disappointed in the amount of light pollution in this supposed "darkness preserve". Several small townships around the area, especially near the radiant of the meteor shower, completely drowned out the darkness near the horizon. Had I known that it would have been so poor there, I probably would have went up to Waterloo and sat somewhere in the southwest area of that recreation area, as the northeast is relatively township-free.

The EXIF information for those interested:
Camera Make: Canon
Camera Model: Canon EOS 20D
Image Date: 2007:08:12 22:12:02 (Central Time, MI is ET.)
Flash Used: No
Focal Length: 17.0mm
CCD Width: 4.81mm
Exposure Time: 118.000 s
Aperture: f/4.0
ISO equiv: 1600
White Balance: Auto
Exposure: Manual
Exposure Mode: Manual

-30-

Labels: , , , ,


More: Full Post and Comments

Tuesday, July 31, 2007

"Self-Goboed" Shoot-Through Umbrella

© 2007 Paul Omernik


Here's something neat about shoot-through umbrellas that I found useful when doing the kitchen Strobist assignment. I call it self-goboing for shoot-through umbrellas, or simply a self-goboing umbrella, and this is how it works:

Undo the removable back from three (3) of the eight (8) ribs. Which three will be determined by where the light is intended to go, but it must be three adjacent ribs. Now fold the removable back in half across the umbrella, like such:


© 2007 Paul Omernik


For added security, it's possible to swap the middle fasteners on opposite sides. First, locate the middle of the unfastened side, which will be the fastener in the red circle:


© 2007 Paul Omernik


The fastener in the white circle is the goboed side of the umbrella. Detach it from its rib:


© 2007 Paul Omernik


Now replace the fastener you just removed with the fastener from the opposte rib:


© 2007 Paul Omernik


And you're done. This will help control spill onto backgrounds, which I found very useful for richer gel color on the background, and there is a nice transitional gradient between the light and dark halves. The proximity of the flash head to the umbrella will determine how much transitional area there is.


Swiveling the flash head towards the open side is also possible, and produces a more efficient source of diffuse light. I could also see this being useful for those wanting to attempt something similar to the specular highlights and watch photos over at Strobist as well.


And finally, a comparison between shoot-through and goboed umbrella:


© 2007 Paul Omernik


© 2007 Paul Omernik

Labels: , , ,


More: Full Post and Comments

A Fantastic Blend

A Fantastic Blend


My second try for the first Strobist 102 assignment. I know it's not a kitchen utensil... more like a kitchen utility, but I think this achieves more of what I had in mind when this assignment was given.

Lighting info: Two 550EX flashes. One shot through half a shoot-through umbrella, with an Omnibounce and CTO gel over the flash head. A second 550 was placed on the table next to the subject, and shot at the background. A Coroplast gridspot and blue gel focused and colored the background spot.


Not the setup shot for this particular image, but very close:


Labels: , , ,


More: Full Post and Comments

Monday, July 30, 2007

Detroit from Windsor

I drove over to Windsor, Ontario, Canada this past weekend to catch a sunset from across the Detroit River on downtown Detroit. Here are a couple images:


Detroit


Renaissance Center HDR


The former is a single exposure, and the latter is an HDR composite of three images.


The GM Building/Renaissance Center is the immediately identifiable landmark on the Detroit skyline. The central tower rises 727 feet to its roof, and contains 73 stories. It was first opened in 1976.

-30-

Labels: , , , , , , ,


More: Full Post and Comments

Friday, July 27, 2007

Measuring Up

Measuring Up

I'm not very happy with this one. The depth is too small, for one, and it's just not how I envisioned it.

Strobist: Two 550EXs. One zoomed to 105mm and modified with a blue gel, and shot through a cuculoris (kookaloris) at the wall. The cookie was a colander.

Second 550 with a CTO gel and zoomed to 17mm, fired into an umbrella placed immediately above the subject. White paper to subject right acted as a reflector to fill in the shadows.

I will probably try again, but most likely with a different subject.

Labels: , ,


More: Full Post and Comments

Sunday, July 22, 2007

The DR is IN


Keeping up with Strobist 102, in choosing a shiny object on which to study specular highlights, I decided to try a bit of product photography.

My setup included two Canon 550EX flashes, a white, plastic colander (yes, a noodle strainer), a glass table, a white box, and a piece of paper.


One 550EX was CTO'd, zoomed to 105mm and set at 1/4 or 1/8 power, fired from behind the white box which was positioned both as a reflector and a gobo, into the colander. The other flash was set around 1/8 power, zoomed to 70mm and fired at the background, through the glass table.


I hope you find this Dr Pepper as refreshing as I did!

Labels: , , ,


More: Full Post and Comments

Wednesday, July 11, 2007

Strobist 102: Apparent Size Technobabble

This will be a detailed and visual discussion regarding apparent flash size.

In order to demonstrate this, I will be using the Small Angle Formula, which says:

s' = s / d ;

Where s is the actual size, d is the subject-to-flash distance, and s' is the apparent size. While this is typically used for much greater distances (this approximation is rather accurate in astronomy) where measurements can be made in fractions of radians (hence small angle formula, and not small area formula), and is invalid for this experiment, my use of it for this occasion is purely to add structure to the demonstration. Yes, the flash head could be approximated into an angular measure, but for sanity's sake, let's ignore that possibility.


Back to the equation. One will see that if one adds a factor of two (2) to the distance, the apparent size is halved (1/2):


½ * s' = ½ * (s / d) ;

or

½ * s' = s / 2d .

Our sizes will be made up areas representing the flash's exposure area. Size of the subject is irrelevant given a large enough light source; in other words, assume our subject is smaller than our light source.


For simplicity (and generalization), I am going to demonstrate this using only variables. If you need numbers to wrap your head around what's happening, start with any area you want. Just remember that each halving of area cuts your length and width dimension by a factor of √2. (Divide length and width each by √2 at each iteration.)


First step. We will say at one "d" our flash has the same apparent size as our subject, so s' = s / 1; s' = s.


Strobist Apparent Size Diagram


(Click small for large.)


To describe the diagram, the image and black box to the extreme left are the subject and flash area, respectively. Each black outline in the subsequent images are representative of the actual sizes of the subject and flash. The solid black boxes are the apparent size of the flash as seen at the respective distances from the subject. Similarly, the white boxes in the subject images represent the apparent size of the subject to the flash.


There are a couple ways to interpret this, but I will just touch on the subject's view of the light, where apparent flash size is the key player.


Notice in distance d that the flash and subject occupy the same area. This is a very large apparent light source. Coincidentally, it's also very close, so the power needed to illuminate the subject properly is very, very low. (Smaller aperture would be the Lighting 101 equivalent.) This produces large, even, soft areas of diffuse highlights. Due to the intimacy of the light to the subject, there is also a rather large area of diffuse shadow, a penumbra, and a comparatively small umbra. In the same vein, depending on subject shape, the transitional area from highlight to shadow (diffused highlight to shadow transform area) will be a broader gradient with a larger apparent light source, ceteris paribus. At larger values of d, these effects are reversed, because of a greater linearity between the source and the subject.


At a greater distance, the subject "sees" a reduced area of flash. However, we know the flash hasn't actually changed size, rather all the intensity of the light source appears to be coming from a smaller area. Also, since the flash is now farther away, the output must be increased, or the aperture must be opened up. The obvious analogy here is how the sun appears to the earth. The sun is big (yeah, yeah, yeah); it's not small (no, no, no). It's also very bright. However, it's distance reduces the sun to a source emitting parallel rays, leaving earth-bound subjects seeing little penumbra, and harsh, well-defined umbras. The exercise here would be to draw lines from the apparent source to the subject, and view how the lines become increasingly parallel with greater distance.


For more line drawing fun, the rays from a "side" of an apparent light source to an analogous "side" of a subject outline an area defines the umbral area--the area of complete shadow. Rays from one "side" of an apparent light source to the opposite "side" of the subject define the outer edge of the penumbral area--a gradient from complete shadow to, say, ambient levels. To find the diffused highlight to shadow transform area on a contoured subject, cross umbral and penumbral rays.


I hope I explained more than confused with this discussion. If you still need to see more in order to understand some of the points, put down the flash and camera and take a flash light to something round. Move the flashlight closer and farther, and attenuate the beam collimation. Bring a white T-shirt along for a diffuser, or shoot through some paper. That should give you a real-time demonstration of all these points, and then some.

Labels: , , , , , ,


More: Full Post and Comments

Wednesday, July 4, 2007

Photographing Fireworks

Snow King Resort 07-04-06

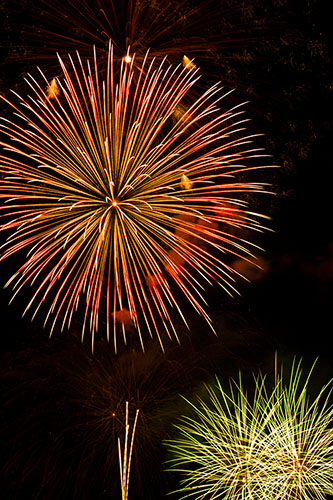
Each year, many millions of spectators all over the world look up at evening skies for exciting displays of pyrotechnics. Some viewers choose to bring cameras, and of those, many are falling short of capturing the "Oohs!" and "Aahs!" associated with fireworks. With a little help, the guesswork will be gone, and your images will be the ones your family and friends will be looking forward to after the show.

First, the materials:
  • Camera. Preferably one with "bulb" mode. White balance control a plus.


  • Point-and-shoots, turn off the flash! On DSLRs, setting the camera to "sunny" will get the closest color representation. Point-and-shoot users might have a choice to make here. Can your compact camera choose to use whatever aperture, focusing, and color temperature you tell it? For example, can you tell the camera to use the sunny setting while still controlling the aperture and where you focus? If so, you're all set, and we'll get to the other settings in a bit. If your point-and-shoot is more limited, choosing "landscape" mode, typically indicated by mountains on the dial, will choose a small aperture, and that will be good for now.


  • Tripod. Or something sturdy to lean on, like a big tree or telephone pole.


  • The exposures will be several seconds long, and the support of a tripod will be best. Compact camera users can sometimes get by with a tree, telephone pole, rock, or otherwise immovable object, by using it as a static monopod. The camera gets pushed against the "monopod", and with ample support, a light shutter finger, and steady hands, the results should be at least okay for a majority of exposures.


  • Cable release.


  • SLR users, get one. Especially if you already have a tripod. Point-and-shoot users, the cost of a cable release might not be justifiable, but again, if you have a tripod, and a cable release port, the investment is a good one. The added bonus with a compact camera and the above "static monopod" is using a cable release means no added shake from releasing the shutter, increasing the keep ratio of photos even more.


  • Black board. Optional.


  • A dark object, like a black piece of foam core, or a black bag, will enable the ability to "close" the shutter to ambient light without releasing the shutter. Why? This allows the capture of multiple volleys in one exposure, without washing out the scene in ambient light.


    Now that we know what to use, learning how and where to photograph fireworks are the next steps in capturing great pyrotechnic imagery.


    DSLR users have it easy. Simply set up your camera with tripod and cable release, and start with these settings: ISO100, f/11, bulb exposure, manual focusing. Shift your aperture for fine tuning. After dusk, there's rarely times where larger than f/8 and smaller than f/16 will be necessary. For focusing, choose either infinity, or hyperfocally. Choose before it gets dark, and make a test exposure to check whether your focus produces sharp images.


    Compact shooters, set up your tripod and attach the cable release, if you have them. Set your ISO to its lowest setting, usually 100 or 200. If you have aperture control, figure out your minimum aperture, then stop up one stop. For instance, if your aperture goes down to f/11, set it to f/8; f/16 would stop up to f/11. However, don't go larger than f/8. This will help reduce some visible mechanical limitations, while preserving great depth of field. As a bonus, if your compact camera allows you to choose the "sunny" setting and set your aperture, do it; the colors should be most accurate with that combination. If you have no idea what I'm talking about, choose the "landscape" (mountain icon, typically) setting and move on.


    The ability to override autofocus and manually focus before it gets dark are important. Focus at infinity or on a distant object (like the horizon), and turn off autofocus. The ability to focus un-aided after dark is slim-to-none, so getting it right in the light is important.


    What focal length to use? Somewhere in the neighborhood of 50 - 60 mm for the wide end, 35mm equivalent; look up conversion factors for your specific camera, compact users. If seated farther away, anything from 70 - 200 mm is acceptable. Don't worry too much about cutting off edges of the bursts. A frame-filling burst will look more spectacular than going too wide and getting tiny spots of color.


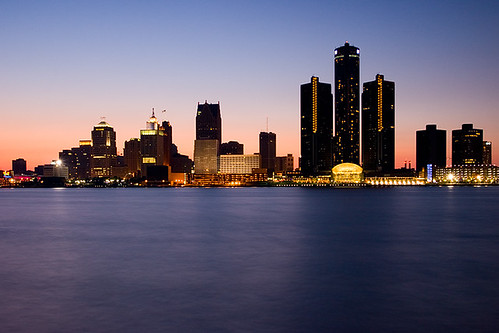
    Location. It's important. Get to the site of the display early, and scout out locations. Are there any hills to give an advantage of view? Any water to use as a foreground for firework reflections? How about landmarks? Capitol building? Bridges? Metropolitan centers? What direction is the prevailing wind? A headwind is the worst case, a side-wind is best, with a stiff back-wind being an option as well. Knowing wind direction is important, because photos through smoke will not have the same "pop" as fireworks in clear sky.


    If finding a suitable location seems impossible, somewhere to capture expressions and spectator heads is fine as well. Foreground elements add a sense of depth and perspective, along with adding to the overall interestingness of the scene.


    A couple final notes before the display begins. If using a tripod and your camera or lens has image stabilization, vibration reduction, or any sort of anti-shake capability, turn it off. Tripods and stabilization motors clash, introducing a vibration into the system. Also, the choice to use noise reduction is yours. The exposures are long, which makes noise a problem. However, noise reduction exposes a black frame (black background subtraction) to help neutraliZe noisy pixels. While the black frame is exposing, your chances of missing fireworks increases. I don't use noise reduction, for what it's worth.


    Now that it's dark and the show is starting, use the first few volleys to chimp (look at the back of your camera) your exposures. Use a histogram if one is available. It should be mostly black, with a spike up towards the highlights. If you're close enough to hear the tubes launch, it'll be easy to figure out about how long it takes from "fwoomp" to burst. Keep this figure in mind as it will help you get exposures that are tighter around each detonation, wasting less time, and introducing less noise.


    In order to capture multiple bursts, use a dark (black) object to carefully block the front of the lens. This will help keep ambient light from washing out the exposure, while allowing several bursts to be captured in one frame. Be warned--several overlapping bursts increase the probability of overexposing areas of the frame. Also, the longer the exposure, the greater the amount of noise.


    Armed with the right tools and knowledge, you too can capture great pyrotechnic photographs. Remember to check your settings periodically to ensure nothing has been bumped. Check the histogram for exposure. Finally, enjoy the celebration!


    Labels: , ,


    More: Full Post and Comments