Tuesday, July 31, 2007

"Self-Goboed" Shoot-Through Umbrella

© 2007 Paul Omernik


Here's something neat about shoot-through umbrellas that I found useful when doing the kitchen Strobist assignment. I call it self-goboing for shoot-through umbrellas, or simply a self-goboing umbrella, and this is how it works:

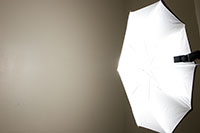
Undo the removable back from three (3) of the eight (8) ribs. Which three will be determined by where the light is intended to go, but it must be three adjacent ribs. Now fold the removable back in half across the umbrella, like such:


© 2007 Paul Omernik


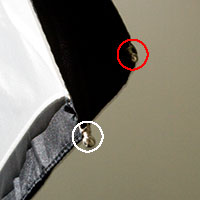
For added security, it's possible to swap the middle fasteners on opposite sides. First, locate the middle of the unfastened side, which will be the fastener in the red circle:


© 2007 Paul Omernik


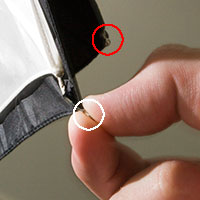
The fastener in the white circle is the goboed side of the umbrella. Detach it from its rib:


© 2007 Paul Omernik


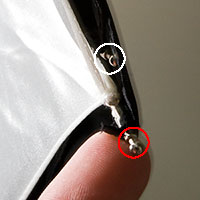
Now replace the fastener you just removed with the fastener from the opposte rib:


© 2007 Paul Omernik


And you're done. This will help control spill onto backgrounds, which I found very useful for richer gel color on the background, and there is a nice transitional gradient between the light and dark halves. The proximity of the flash head to the umbrella will determine how much transitional area there is.


Swiveling the flash head towards the open side is also possible, and produces a more efficient source of diffuse light. I could also see this being useful for those wanting to attempt something similar to the specular highlights and watch photos over at Strobist as well.


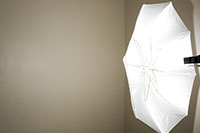
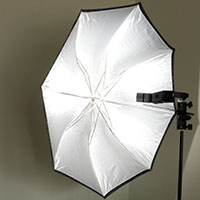
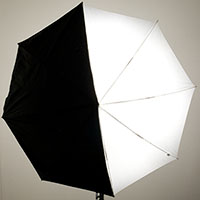
And finally, a comparison between shoot-through and goboed umbrella:


© 2007 Paul Omernik


© 2007 Paul Omernik

Labels: , , ,


More: Full Post and Comments

A Fantastic Blend

A Fantastic Blend


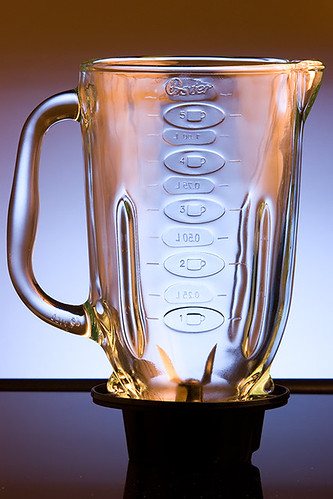
My second try for the first Strobist 102 assignment. I know it's not a kitchen utensil... more like a kitchen utility, but I think this achieves more of what I had in mind when this assignment was given.

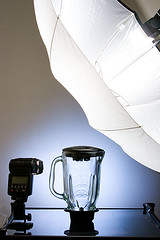
Lighting info: Two 550EX flashes. One shot through half a shoot-through umbrella, with an Omnibounce and CTO gel over the flash head. A second 550 was placed on the table next to the subject, and shot at the background. A Coroplast gridspot and blue gel focused and colored the background spot.


Not the setup shot for this particular image, but very close:


Labels: , , ,


More: Full Post and Comments

Friday, July 27, 2007

Measuring Up

Measuring Up

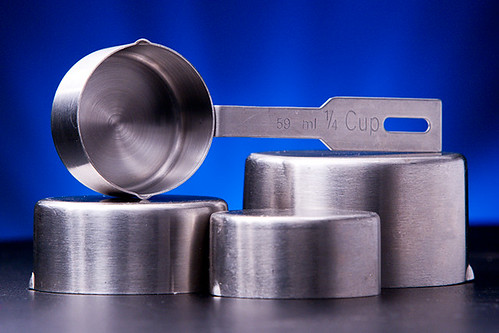
I'm not very happy with this one. The depth is too small, for one, and it's just not how I envisioned it.

Strobist: Two 550EXs. One zoomed to 105mm and modified with a blue gel, and shot through a cuculoris (kookaloris) at the wall. The cookie was a colander.

Second 550 with a CTO gel and zoomed to 17mm, fired into an umbrella placed immediately above the subject. White paper to subject right acted as a reflector to fill in the shadows.

I will probably try again, but most likely with a different subject.

Labels: , ,


More: Full Post and Comments

Sunday, July 22, 2007

The DR is IN


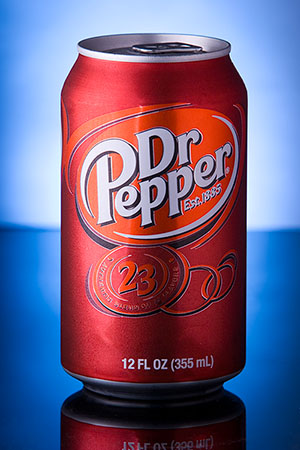
Keeping up with Strobist 102, in choosing a shiny object on which to study specular highlights, I decided to try a bit of product photography.

My setup included two Canon 550EX flashes, a white, plastic colander (yes, a noodle strainer), a glass table, a white box, and a piece of paper.


One 550EX was CTO'd, zoomed to 105mm and set at 1/4 or 1/8 power, fired from behind the white box which was positioned both as a reflector and a gobo, into the colander. The other flash was set around 1/8 power, zoomed to 70mm and fired at the background, through the glass table.


I hope you find this Dr Pepper as refreshing as I did!

Labels: , , ,


More: Full Post and Comments

Wednesday, July 11, 2007

Strobist 102: Apparent Size Technobabble

This will be a detailed and visual discussion regarding apparent flash size.

In order to demonstrate this, I will be using the Small Angle Formula, which says:

s' = s / d ;

Where s is the actual size, d is the subject-to-flash distance, and s' is the apparent size. While this is typically used for much greater distances (this approximation is rather accurate in astronomy) where measurements can be made in fractions of radians (hence small angle formula, and not small area formula), and is invalid for this experiment, my use of it for this occasion is purely to add structure to the demonstration. Yes, the flash head could be approximated into an angular measure, but for sanity's sake, let's ignore that possibility.


Back to the equation. One will see that if one adds a factor of two (2) to the distance, the apparent size is halved (1/2):


½ * s' = ½ * (s / d) ;

or

½ * s' = s / 2d .

Our sizes will be made up areas representing the flash's exposure area. Size of the subject is irrelevant given a large enough light source; in other words, assume our subject is smaller than our light source.


For simplicity (and generalization), I am going to demonstrate this using only variables. If you need numbers to wrap your head around what's happening, start with any area you want. Just remember that each halving of area cuts your length and width dimension by a factor of √2. (Divide length and width each by √2 at each iteration.)


First step. We will say at one "d" our flash has the same apparent size as our subject, so s' = s / 1; s' = s.


Strobist Apparent Size Diagram


(Click small for large.)


To describe the diagram, the image and black box to the extreme left are the subject and flash area, respectively. Each black outline in the subsequent images are representative of the actual sizes of the subject and flash. The solid black boxes are the apparent size of the flash as seen at the respective distances from the subject. Similarly, the white boxes in the subject images represent the apparent size of the subject to the flash.


There are a couple ways to interpret this, but I will just touch on the subject's view of the light, where apparent flash size is the key player.


Notice in distance d that the flash and subject occupy the same area. This is a very large apparent light source. Coincidentally, it's also very close, so the power needed to illuminate the subject properly is very, very low. (Smaller aperture would be the Lighting 101 equivalent.) This produces large, even, soft areas of diffuse highlights. Due to the intimacy of the light to the subject, there is also a rather large area of diffuse shadow, a penumbra, and a comparatively small umbra. In the same vein, depending on subject shape, the transitional area from highlight to shadow (diffused highlight to shadow transform area) will be a broader gradient with a larger apparent light source, ceteris paribus. At larger values of d, these effects are reversed, because of a greater linearity between the source and the subject.


At a greater distance, the subject "sees" a reduced area of flash. However, we know the flash hasn't actually changed size, rather all the intensity of the light source appears to be coming from a smaller area. Also, since the flash is now farther away, the output must be increased, or the aperture must be opened up. The obvious analogy here is how the sun appears to the earth. The sun is big (yeah, yeah, yeah); it's not small (no, no, no). It's also very bright. However, it's distance reduces the sun to a source emitting parallel rays, leaving earth-bound subjects seeing little penumbra, and harsh, well-defined umbras. The exercise here would be to draw lines from the apparent source to the subject, and view how the lines become increasingly parallel with greater distance.


For more line drawing fun, the rays from a "side" of an apparent light source to an analogous "side" of a subject outline an area defines the umbral area--the area of complete shadow. Rays from one "side" of an apparent light source to the opposite "side" of the subject define the outer edge of the penumbral area--a gradient from complete shadow to, say, ambient levels. To find the diffused highlight to shadow transform area on a contoured subject, cross umbral and penumbral rays.


I hope I explained more than confused with this discussion. If you still need to see more in order to understand some of the points, put down the flash and camera and take a flash light to something round. Move the flashlight closer and farther, and attenuate the beam collimation. Bring a white T-shirt along for a diffuser, or shoot through some paper. That should give you a real-time demonstration of all these points, and then some.
Labels: , , , , , ,


More: Full Post and Comments

Tuesday, July 10, 2007

Strobist 102: Apparent Size

Strobist Cherry, Apparent Size Control

To a subject, the apparent size of the light source will be a large determinate of the quality of light. In order to demonstrate this to myself and for the 102 Control, I photographed a Bing cherry. Lighting was supplied by a hand-aimed 550EX at 50mm with a Sto-Fen Omnibounce affixed to the front.

Aperture and shutter speed remained constant, the ISO, flash-to-subject distance, and flash power changed--from 100 to 400, one inch to nearly six feet, and 1/128th to 1/1, respectively.

Approximation of apparent size is found via the Small Angle Formula:

s' = s / d

Where doubling the distance (d) halves the apparent size (s'). While this is largely an approximation, especially at close distances, it allows for a structured set of tests with clear results.


One will notice how the highlights go from large and diffuse to small and intense. An increased apparent parallelism in the strobe is seen by the subject, creating harder light, and more intense specular highlights. Also noteworthy are the sizes of the specular highlights after eight inches; they are very similar. Perhaps the Small Angle Formula achieves sufficient accuracy between eight and sixteen inches.

Learn to light at Strobist.

Labels: , , , ,


More: Full Post and Comments